


Mastering the Art of Plastering: Your Beginner's DIY Guide
There’s something incredibly satisfying about transforming a tired, uneven wall into a smooth, ready-to-decorate surface. While plastering might seem like a dark art reserved for seasoned tradespeople, the truth is, with the right tools, a bit of patience, and our beginner-friendly guide, you can absolutely achieve professional-looking results in your own home.
Whether you're tackling a new extension, patching up old damage, or simply refreshing a room, learning how to plaster a wall yourself can save you a significant amount on labour costs. And, let's be honest, the bragging rights are pretty good too! At DSIDE.co.uk, we're all about empowering DIY enthusiasts to take on ambitious projects, and plastering is a fantastic skill to add to your repertoire. Let's get started!
Why Plaster Your Own Walls?
- Cost Savings: Professional plasterers can charge anywhere from £200-£500 per room, depending on size and complexity. Doing it yourself dramatically cuts these costs.
- Satisfaction: There's immense pride in stepping back and admiring a perfectly smooth wall that you created.
- Control: You dictate the schedule and can ensure every detail meets your standards.
Is Plastering Difficult for Beginners?
Plastering has a steep learning curve, and your first attempt might not be perfect. However, with practice on a small, less critical area, you'll quickly get a feel for the material and techniques. The key is understanding the steps, having the right tools, and not being afraid to make mistakes – after all, it's just plaster, and you can always scrape it off and try again!
Essential Tools & Materials You'll Need
Before you even think about mixing plaster, ensure you have all the necessary equipment. Investing in decent tools will make the job much easier and improve your finish. Remember, you can compare prices on all these tools at DSIDE.co.uk!
Key Tools:
- Plastering Trowel: Your most important tool. Look for a stainless steel trowel with a comfortable handle. Brands like Marshalltown, Nela, or OX Tools are highly recommended for their quality and durability. A good 14-inch (355mm) trowel is a great all-rounder. Expect to pay around £40-£80.
- Plastering Hawk: A flat plate with a handle underneath, used to hold a small amount of plaster for easy transfer to your trowel. Essential for efficient working. Prices range from £15-£30.
- Mixing Drill & Paddle: A powerful drill (1100W+ recommended) with a paddle attachment is crucial for mixing plaster evenly and lump-free. Brands like DeWalt (e.g., DeWalt D21520), Makita (e.g., Makita UT1600), Bosch, or Milwaukee offer excellent mixing drills. You might pick one up for £150-£300, or rent one for a day.
- Large Mixing Buckets: Two or three 25-litre buckets are ideal – one for mixing, one for clean water, and one for waste. Cheap and cheerful, around £5-£10 each.
- Spot Board: A piece of plywood or a dedicated plastic board (around 60x60cm) used to hold a larger quantity of mixed plaster on the floor, ready to load onto your hawk. Around £10-£20.
- Water Brush: For wetting tools and cleaning. A standard wallpaper brush works well. (£5-£10)
- Plastering Scraper: For cleaning tools and scraping off excess plaster. (£5-£15)
- Straight Edge/Feather Edge: A long, straight aluminium ruler (e.g., a 2m plastering rule) for flattening large areas and checking for level. Brands like Marshalltown offer good quality. Expect to pay £30-£70.
- Tape Measure: For checking dimensions.
- Spirit Level: To ensure your walls are plumb and straight.
- Stanley Knife/Utility Knife: For cutting plasterboard tape or trimming.
- Dust Sheets & Masking Tape: To protect floors and adjacent surfaces.
- Safety Gear: Gloves, safety glasses, and a dust mask are non-negotiable.
Where to Buy: You'll find these tools at major UK retailers like Screwfix, Toolstation, and Amazon UK. Remember to use DSIDE.co.uk to compare prices before you buy!
Key Materials:
- Plaster: For skim plastering (covering existing walls or plasterboard), British Gypsum Multi-Finish is the industry standard and most forgiving for beginners. A 25kg bag costs around £8-£12.
- PVA Bonding Agent: Essential for preparing porous surfaces. A 5-litre tub of concentrated PVA can cost £15-£25. For very damp or challenging surfaces, consider SBR (Styrene Butadiene Rubber) bonding agent, which is more expensive but provides superior adhesion.
- Water: Clean tap water for mixing plaster and cleaning.
- Scrim Tape (Optional): If you're plastering over plasterboard joints or cracks, fibreglass scrim tape is needed to reinforce these areas. Around £3-£5 per roll.
Safety First!
Always wear appropriate personal protective equipment (PPE): safety glasses to protect your eyes from splashes, sturdy gloves to protect your hands from the alkaline plaster, and a dust mask when mixing dry plaster. Plaster dust can be irritating to airways. Ensure good ventilation in your workspace.
Your Step-by-Step Guide to Plastering a Wall
Step 1: Preparation is Absolutely Key
This cannot be stressed enough. Poor preparation will lead to poor results.
- Clear the Room: Remove furniture, cover anything you can't move with dust sheets. Mask off skirting boards, door frames, and window frames with masking tape.
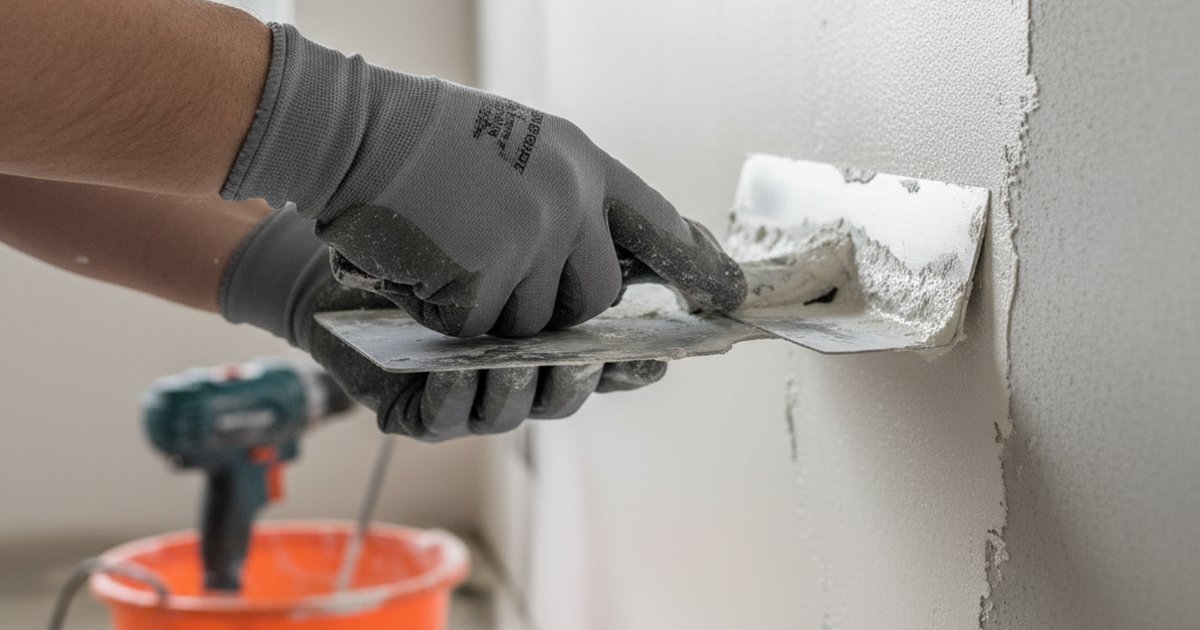
- Inspect the Wall: Scrape off any loose paint, old plaster, or wallpaper. Fill any deep holes or cracks with a suitable filler (e.g., a quick-setting repair plaster) and let it dry.
- Clean the Surface: Brush down the wall to remove dust and debris. A clean surface ensures proper adhesion.
- Apply PVA Bonding Agent: Mix your PVA with water according to the manufacturer's instructions (usually 1 part PVA to 4-5 parts water for the first coat, 1 part PVA to 3 parts water for the second). Apply the first coat evenly with a roller or large brush. Let it dry completely. For the second coat, apply it just before you start plastering, ensuring it's tacky but not fully dry when you apply your first coat of plaster. This creates a strong bond.
- Apply Scrim Tape (If Needed): If you're plastering over new plasterboard, apply self-adhesive fibreglass scrim tape along all joints and internal corners. This helps prevent cracks.
Step 2: Mixing the Plaster
This is where your mixing drill comes in. Proper consistency is vital.
- Add Water First: Pour about 5-6 litres of clean, cold water into your large mixing bucket.
- Add Plaster Gradually: Slowly add the 25kg bag of Multi-Finish plaster to the water, spreading it evenly across the surface until small islands of dry plaster appear (this is called 'chucking in').
- Let it Soak: Allow the plaster to soak for 2-5 minutes. This is called 'slaking' and helps prevent lumps.
- Mix Thoroughly: Using your mixing drill and paddle, mix the plaster until it's a smooth, lump-free, creamy consistency, similar to thick custard or soft ice cream. It should hold its shape on the paddle but still be spreadable. Avoid overmixing, as this can introduce air bubbles and reduce the setting time.
Step 3: Applying the First Coat (The 'Scratch' Coat)
Work quickly but calmly, as plaster has a limited working time (typically 45-90 minutes, depending on conditions and type).
- Load Your Hawk: Use your trowel to scoop plaster from your mixing bucket or spot board onto your hawk. Don't overload it initially.
- Transfer to Trowel: Scoop plaster from the hawk onto the bottom edge of your plastering trowel.
- Apply to Wall: Starting from a bottom corner, press the trowel firmly against the wall at a shallow angle (around 20-30 degrees), pushing the plaster upwards and outwards in sweeping motions. Aim for a thickness of about 2-3mm.
- Cover the Area: Work in sections, always joining wet plaster to wet plaster. Don't worry too much about perfection yet; the goal is to get an even coverage.
- Flatten (First Pass): Once a section is covered, use your trowel or a long straight edge to flatten the plaster, removing any major humps or hollows. Scrape excess plaster back into your bucket.
- Corners: Use the edge of your trowel to neatly define internal and external corners.
Step 4: Applying the Second Coat (The 'Finishing' Coat)
Wait for the first coat to 'firm up'. It should be firm enough that it doesn't move when you gently press it, but still slightly pliable. This usually takes 20-40 minutes.
- Mix Fresh Plaster: If your first batch has started to go off, mix a fresh batch for the second coat.
- Apply Thinly: Apply the second coat in the same way as the first, but much thinner – around 1-2mm. This coat is all about refinement. Fill in any minor imperfections from the first coat.
- Flatten (Second Pass): Use your trowel or straight edge to flatten the surface again. At this stage, you're aiming for a much smoother, flatter finish.
Step 5: Trowelling and Finishing (The 'Setting' Stage)
This is where the magic happens and you achieve that smooth, glossy finish. This stage requires careful timing.
- First Trowel-Up: As the second coat starts to stiffen (when the plaster begins to 'pull' slightly on your trowel), gently lay your clean, slightly damp trowel flat against the wall. Push firmly and glide it across the surface in sweeping arcs, lifting the plaster and filling any tiny imperfections. The aim is to close up the surface.
- Second Trowel-Up: As the plaster continues to set, the surface will feel firmer. Dampen your brush and lightly flick water onto the wall (a very fine mist, don't soak it). Then, with increasing pressure, use your clean trowel to smooth out the surface. The water helps to bring a 'fat' (fine plaster particles) to the surface, creating that characteristic sheen.
- Final Polish: As the plaster becomes almost rock hard, make your final passes with the trowel, using maximum pressure and long, sweeping strokes. Clean your trowel frequently. You'll see the wall take on a shiny, glass-like finish. Pay extra attention to corners and edges.
Step 6: Cleaning Up
Clean your tools thoroughly with water immediately after you finish. Dried plaster is incredibly difficult to remove and can ruin your tools. Scrape excess plaster off your trowel, hawk, and buckets, then wash them clean. Never wash plaster down a domestic drain, as it can solidify and cause blockages.
Common Plastering Mistakes to Avoid for Beginners
- Too Much Water: Leads to a runny mix that's hard to work with and prone to cracking.
- Not Enough PVA: Poor adhesion means the plaster can peel or crack.
- Working Too Slow: Plaster sets quickly; dawdling means you'll be working on stiff material.
- Over-trowelling Early: Trying to polish too early will just drag the plaster and make it uneven.
- Under-trowelling Late: Not giving enough pressure at the final stages will leave a dull, less refined finish.
Pro Tips for a Perfect Finish
- Start Small: Tackle a small wall or even a patch repair first to build confidence.
- Patience and Practice: Plastering is a skill that improves with repetition. Don't get discouraged if your first attempts aren't perfect.
- Watch Videos: Complement this guide with video tutorials to see the techniques in action.
- Keep Tools Clean: Always keep your trowel and hawk spotless. Any dried plaster will leave marks.
- Manage Your Mix: Only mix as much plaster as you can comfortably apply within its working time. It's better to mix smaller batches.
Ready to Plaster Your Walls?
Plastering a wall is a challenging but incredibly rewarding DIY project. With our guide, the right tools, and a determination to learn, you'll soon be achieving beautifully smooth walls ready for painting or wallpapering. Remember, a professional finish starts with quality tools. Before you head to Screwfix, Toolstation, or Amazon UK, make sure you compare prices on all your plastering gear at DSIDE.co.uk to ensure you're getting the best possible deal. Happy plastering!
Comments (0)
No comments yet. Be the first to share your thoughts!