


Dreaming of bountiful harvests, vibrant flowers, or simply a neater, more manageable garden space? Building a raised garden bed could be your next rewarding DIY project! Not only do they look fantastic, but raised beds offer a wealth of benefits from improved soil quality to easier access. And the best part? It's a project perfectly suited for keen DIYers across the UK.
In this comprehensive guide, we'll walk you through every step of constructing your own raised garden bed, from initial planning to filling it with nutrient-rich soil. We'll cover the essential tools you'll need, recommend some top brands, and help you source materials efficiently. Remember, for all your tool and hardware needs, you can always compare prices and find the best deals at DSIDE.co.uk.
Why Build a Raised Garden Bed?
Raised garden beds are more than just an aesthetic choice; they’re a smart gardening solution offering numerous advantages:
- Improved Soil Quality & Drainage: You have complete control over the soil mix, ensuring it's perfect for your plants. The elevated structure also prevents compaction and ensures excellent drainage, vital for healthy root development.
- Extended Growing Season: Soil in a raised bed warms up faster in spring and stays warmer longer into autumn, allowing you to get an earlier start and a later finish to your growing year.
- Accessibility & Comfort: Taller beds mean less bending, stooping, and kneeling, making gardening more comfortable, especially for those with back issues or mobility challenges.
- Pest Control: The elevated height can deter some ground-dwelling pests and makes it easier to install barriers like copper tape or netting.
- Neater Appearance: Raised beds create a defined, organised look in your garden, often enhancing its overall aesthetic appeal.
- Weed Suppression: By starting with fresh, weed-free soil, you significantly reduce the amount of weeding required.
Planning Your Raised Garden Bed
A little planning goes a long way. Consider these points before you even pick up a saw:
Location, Location, Location
- Sunlight: Most vegetables and flowering plants need at least 6-8 hours of direct sunlight per day. Observe your garden throughout the day to find the sunniest spot.
- Water Access: Position your bed within easy reach of a hosepipe or water butt for convenient irrigation.
- Level Ground: While you can build on a slight slope, a reasonably level area will make construction much easier.
Size, Shape & Depth
- Width: Aim for a width no more than 1.2 metres (4 feet) so you can comfortably reach the centre from either side without stepping on the soil.
- Length: This is flexible, depending on your space. Common lengths are 1.8m (6ft) or 2.4m (8ft).
- Depth: For most vegetables, a depth of 30-45cm (12-18 inches) is ideal. Deeper beds offer more room for root crops and better insulation.
Choosing Your Materials: Timber is King for DIY
While brick, stone, and recycled plastic are options, timber is the most popular choice for DIY raised beds due to its ease of working and natural aesthetic.
- Tanalised (Pressure-Treated) Softwood: This is a popular and cost-effective option. The timber is treated with preservatives to resist rot and insect attack, significantly extending its lifespan in outdoor conditions. Look for timber certified safe for gardening (e.g., ACQ treatment). It’s readily available from timber merchants, Screwfix, Toolstation, Wickes, and B&Q.
- Untreated Hardwood (e.g., Oak, Larch, Cedar): These timbers are naturally more resistant to rot and offer a beautiful, premium finish. However, they are significantly more expensive and harder to work with.
For this guide, we'll focus on using tanalised softwood, typically 150mm x 50mm (6x2 inches) or 200mm x 50mm (8x2 inches) for the main boards, and possibly 50mm x 50mm (2x2 inches) for corner posts.
Essential Tools for the Job
Having the right tools makes all the difference. Many of these you might already own, but if not, DSIDE.co.uk is the perfect place to compare prices on new additions to your toolkit!
- Measuring & Marking:
- Tape Measure: A robust 5m or 8m Stanley FatMax will be indispensable.
- Pencil & Builder's Square: For accurate marking and ensuring perfect 90-degree angles.
- Cutting:
- Circular Saw: For straight, fast, and accurate cuts on larger timber. A cordless option like the DeWalt DCS570N, Makita DHS680Z, or a corded Bosch PKS 66A will make light work of your boards.
- Hand Saw: A Spear & Jackson or Bahco hand saw is useful for smaller adjustments or if you prefer a manual approach.
- Mitre Saw (Optional): If you want highly precise angle cuts, a mitre saw (e.g., Ryobi R18MS216-0 or Bosch GCM 8 SJL) is a fantastic luxury.
- Drilling & Fastening:
- Cordless Combi Drill: An absolute essential. Brands like Milwaukee M18, Makita DHP484, or DeWalt DCD796 offer excellent power and battery life.
- Impact Driver (Highly Recommended): For driving long screws with ease, an impact driver pairs perfectly with your drill (e.g., Ryobi R18IDBL-0).
- Drill Bits: Wood bits for pilot holes and a countersink bit for neat screw heads.
- Exterior Grade Screws: Use galvanised or stainless steel timber screws, at least 100mm long for 50mm thick timber (e.g., landscape screws).
- Levelling:
- Spirit Level: A 600mm (2ft) or 1200mm (4ft) spirit level (e.g., Faithfull or Stanley) for ensuring your bed is perfectly level.
- Safety Gear:
- Safety Glasses: Always protect your eyes (e.g., Bolle).
- Gloves: For handling timber.
- Ear Protection: When using power tools.
- Other: Shovel, wheelbarrow, heavy-duty staple gun (for liner).
Step-by-Step Construction Guide
Step 1: Gather Materials & Cut Your Timber
Once you've finalised your dimensions, purchase your tanalised timber. For a 2.4m x 1.2m (8ft x 4ft) raised bed, 45cm (18 inches) high, you'll need approximately:
- Four 2.4m (8ft) lengths of 150x50mm timber.
- Four 1.2m (4ft) lengths of 150x50mm timber.
- Four 45cm (18 inch) lengths of 50x50mm timber for internal corner posts.
- Roughly 100-150 exterior-grade timber screws, 100mm-120mm long.
DSIDE Tip: Check local timber merchants as well as Screwfix and Toolstation for the best prices on bulk timber. Don't forget to compare power tool prices on DSIDE.co.uk before you buy!
Using your tape measure and builder's square, accurately mark all your cuts. With your circular saw, make precise cuts. Always wear safety glasses and ear protection!
Step 2: Assemble the First Layer
Lay out two long and two short boards to form your base rectangle. Ensure the corners are square. Position a 50x50mm corner post flush with the inside corner of the joint. Pre-drill pilot holes through the outer boards and into the corner post to prevent the timber from splitting. Then, drive at least two 100mm screws through each board into the corner post at each corner, creating a strong joint.
Step 3: Stack & Secure Subsequent Layers
Once the first layer is complete, stack the next layer directly on top. For added strength, it's good practice to offset the joints if possible (e.g., place a long board over the joint of the two boards below). Secure this layer by screwing downwards into the timber below, ensuring you hit the corner posts for maximum stability. Continue stacking and securing until you reach your desired height.
Alternatively, you can create separate 'frames' for each layer and then stack them, securing them together through the corner posts and horizontally between layers.
Step 4: Ensure Level & Square
Once assembled, use your long spirit level to check the top edges of your raised bed. If it's slightly off, you can gently dig away or add soil beneath the base to level it. Double-check the diagonals with your tape measure – if they're equal, your bed is square.
Step 5: Add a Liner (Optional but Recommended)
While not strictly necessary, lining the inside of your raised bed can prolong its life, especially with untreated timber. Use a heavy-duty pond liner or dedicated raised bed liner (not standard weed membrane, as it's too thin and won't protect the wood from moisture as effectively). Staple the liner to the inside walls, leaving a gap of a few centimetres at the very bottom for drainage. Don't line the base – you want contact with the ground for worms and natural drainage.
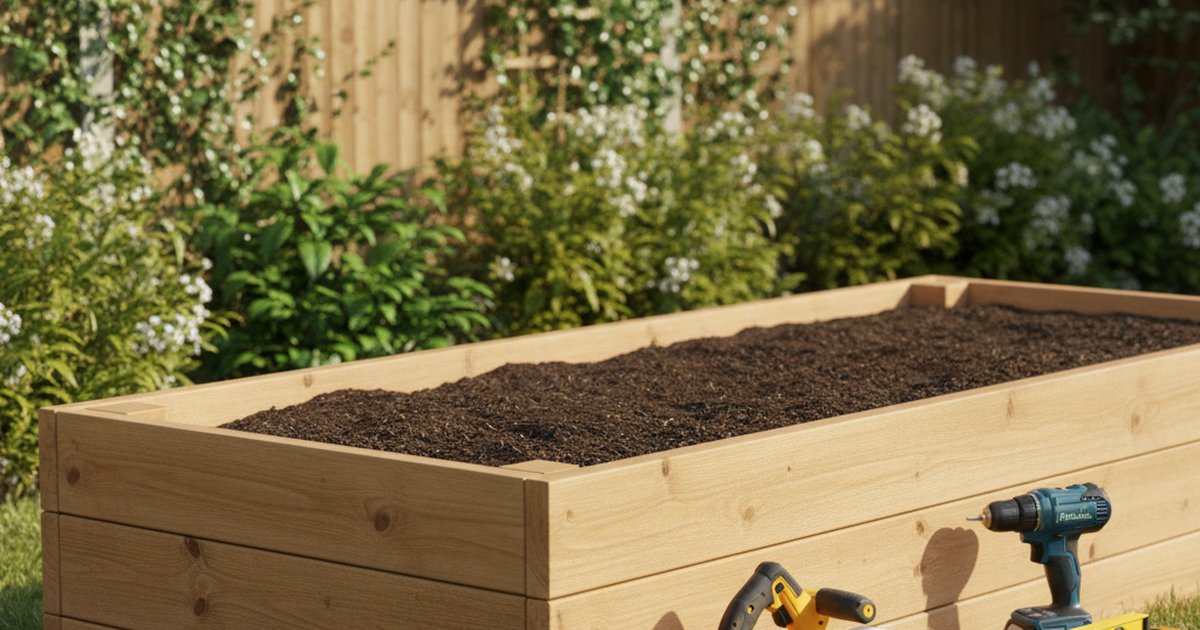
Step 6: Fill Your Raised Bed
This is the fun part! Filling your bed efficiently helps with drainage and provides nutrients:
- Bottom Layer (15-20cm): Add coarse materials like small branches, twigs, old leaves, cardboard, or wood chips. This layer aids drainage and slowly decomposes, adding nutrients.
- Middle Layer (20-30cm): Mix good quality topsoil with well-rotted garden compost or manure. This forms the bulk of your growing medium.
- Top Layer (10-15cm): Finish with a fine, nutrient-rich compost or specific raised bed mix. This is where your seeds and young plants will start their journey.
Estimated Costs (Excluding Tools)
Building a 2.4m x 1.2m x 0.45m tanalised timber raised bed will vary, but here's a rough estimate:
- Tanalised Timber: £80 - £150 (depending on size and supplier).
- Exterior Screws: £15 - £25.
- Liner (if used): £20 - £50.
- Soil/Compost (bulk bag or multiple bags): £80 - £150.
Total Materials Estimate: £195 - £375. Remember, tools are an investment, and by comparing prices on DSIDE.co.uk, you can often save a significant amount on brands like DeWalt, Makita, Bosch, and Milwaukee.
Maintaining Your Raised Bed
To keep your raised bed thriving, top up the soil annually with fresh compost to replenish nutrients. Monitor moisture levels, as raised beds can dry out faster than ground-level beds, especially in summer. Consider crop rotation to maintain soil health over the years.
Start Your Raised Bed Journey Today!
Building a raised garden bed is a hugely satisfying project that can revolutionise your gardening experience. With the right tools, materials, and this step-by-step guide, you'll be enjoying your fresh produce or beautiful blooms in no time.
Ready to get started? Head over to DSIDE.co.uk to find and compare the best prices on all the power tools, hand tools, and hardware you'll need for your raised bed project and beyond. Happy building, and happy gardening!
Comments (0)
No comments yet. Be the first to share your thoughts!